Amazing effects without effort
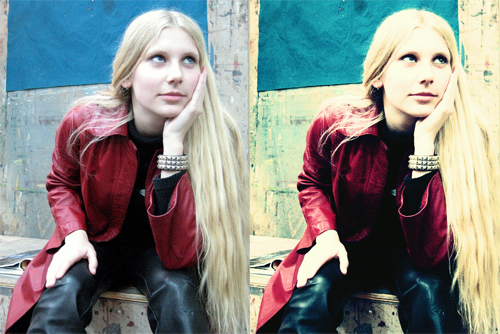
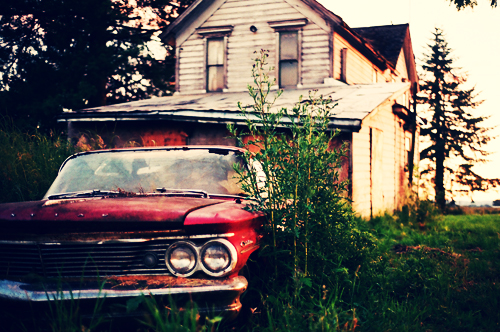
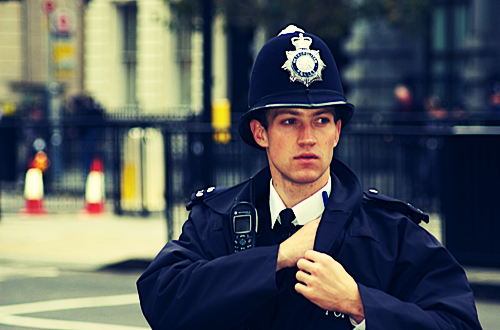
Today we feature a short but useful tutorial about cross processing with Photoshop. This effect originally comes from analogue photography and dates back to the 80’s of the 20th century. It used to be very popular at that time and now comes back to fame in the digital age. Means and methods of achieving this effect have of course changed since then.
In analogue photography certain films require certain chemicals for correct development. Negative color print film and positive color reversal film are processed with different chemicals. If you switch the chemicals and use them to treat the ‘wrong’ type of photographic film you can achieve astonishing results.
Nowadays we hardly develop film anymore. We tend to edit photos digitally. Reproducing this effect (with Photoshop CS in this case) is quite simple.
The settings and values used in this tutorial are no set values; they are hints towards the right direction. Especially with this effect it’s useful and fun to try your way around as the picture you start with has great influence on the later result.
The tutorial was created by our talented German crew, so the Photoshop dialogues are in German. This shouldn’t be an issue, however, as the steps and their positions in the dialogue boxes are still the same. Anyway, if something isn’t entirely clear to you just write us a comment and we see to it. Oh, and by the way: there’s a contest at the end of this article!
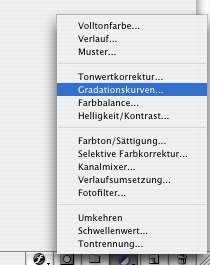
1. Open a suitable picture –one with low contrast in our case – in Photoshop and create a new adjustment layer for curves.
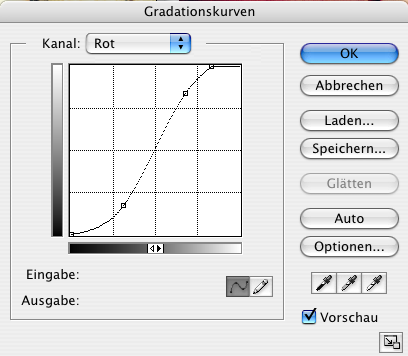
It is important here that you don’t edit all channels (RGB) in one go but pick one after another. We begin with the red channel and change it into an S-curve. Thus, highlights receive more red while shadows lose a bit of it.
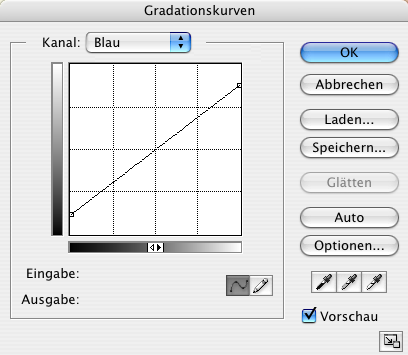
2. Next we switch to the blue channel and adapt it according to the figure below/above.
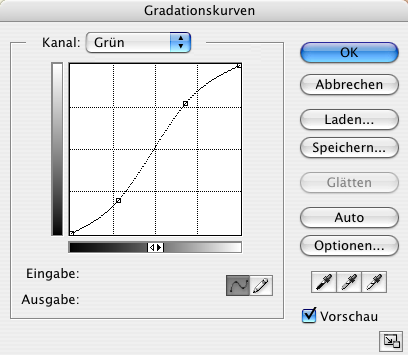
3. For the third step we work with the green channel and again transform it into an S-curve, yet with less amplitude than the red one. As you instantly see the effect in your picture (with preview checked) you have perfect control of the outcome and can change the curves according to your needs.
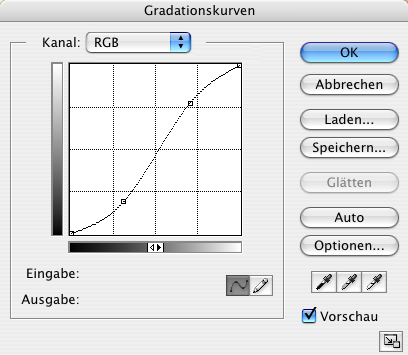
4. Time to make some contrast adjustments. For that you apply a new curves adjustment layer.
In this step you can work with all RGB channels at once. Give the curve a slight S-shape again. How strong it should be really depends on the picture. As a rule of thumb the more contrast you started with the less distinct the shape should be.
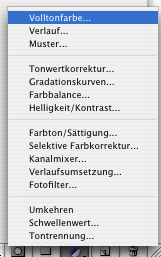
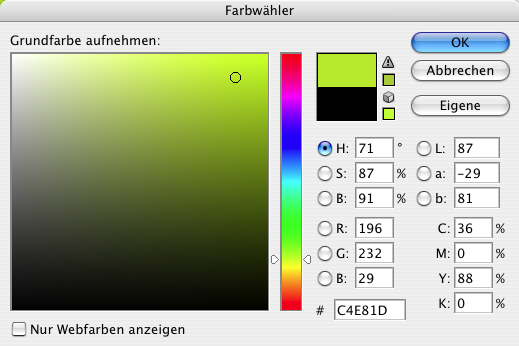
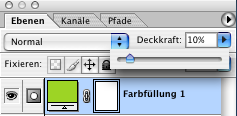
5. The work is almost done now but we want to spice the picture up a little. To adjust the hue of the image we create a solid colour layer and give it a green-yellowish tint.
We set the transparency control of this layer at about 10% and are happy with the result. :)
As mentioned above all values for the curves are optional. As long as you roughly follow the suggested shapes of the curves you can play around until you come to the perfect result for your picture.
Contest
Now we would like to see what you make of this. Just take one of your pictures and give it a try!
Pack your best cross-processing image in an E-mail and send it to [email protected] to win a $50 print voucher. We will also feature the winning picture here in our blog. You can enter the competition until September 7, 2010!
No Photoshop at home? Not a problem: this also works with Pixlr, the best of the free online Photoshop alternatives we tested.
Have fun!
