Cut from supreme wood
Flyers come alive through theme based content. The first few seconds decide if a flyer is successful. The viewer’s interest must be aroused on first glance. There’s many ways to achieve this. Eyecatching headlines are one. During the next few weeks we show you some examples and how to create theme based lettering to attract the eye of the beholder.
For this first example we could imagine a fair for handcrafts or toys. A flyer for such an event might show lettering, which appears to be constructed with timber and screws. The values used in this tutorial are for orientation and can of course be tweaked according to your needs. Trying around is a great way to learn, after all.
Creating a background
Open a new document, sized 1900×1900 pixels, with white background and double click the background layer to get a layer 0.

Via Layer > Layer Style you activate Gradient Overlay and set the colours to light grey moving to darker grey. For that you click the existing gradient and in the following dialogue you click first the left and then the right colour stop.

Through the colour option in the gradient editor you get to the colour selector where you select #f5f5f5 for the first colour stop. The opposite side colour stop you set to #d1d1d1. The Gradient Style you define with radial, scale should be set to 150%. This gives you a slightly more interesting background as basis for your work.
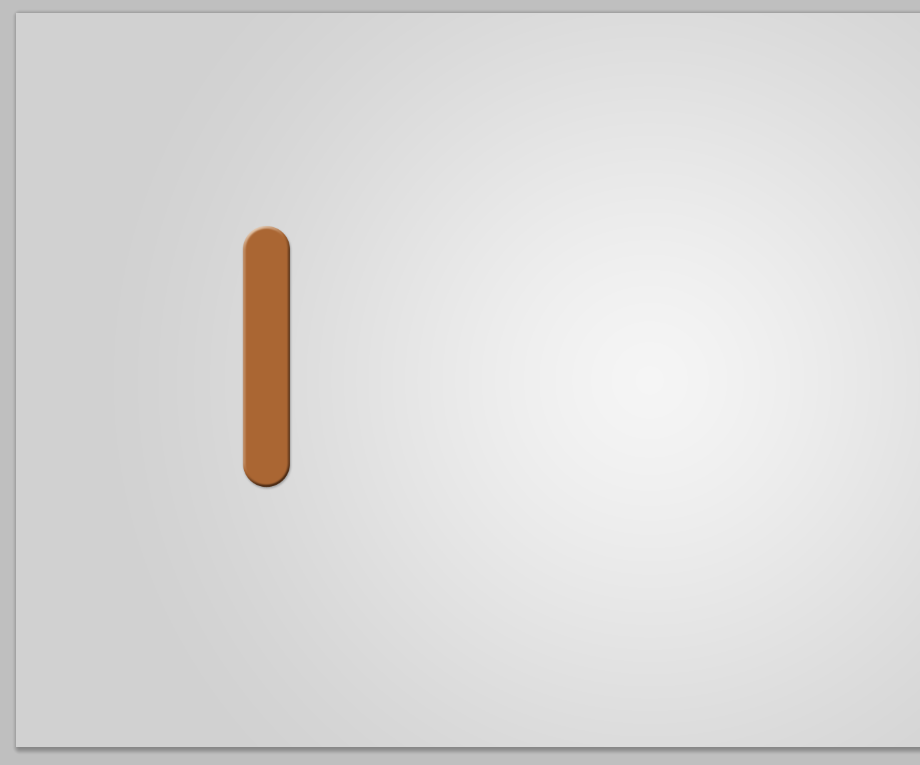
Basic shape: wood piece
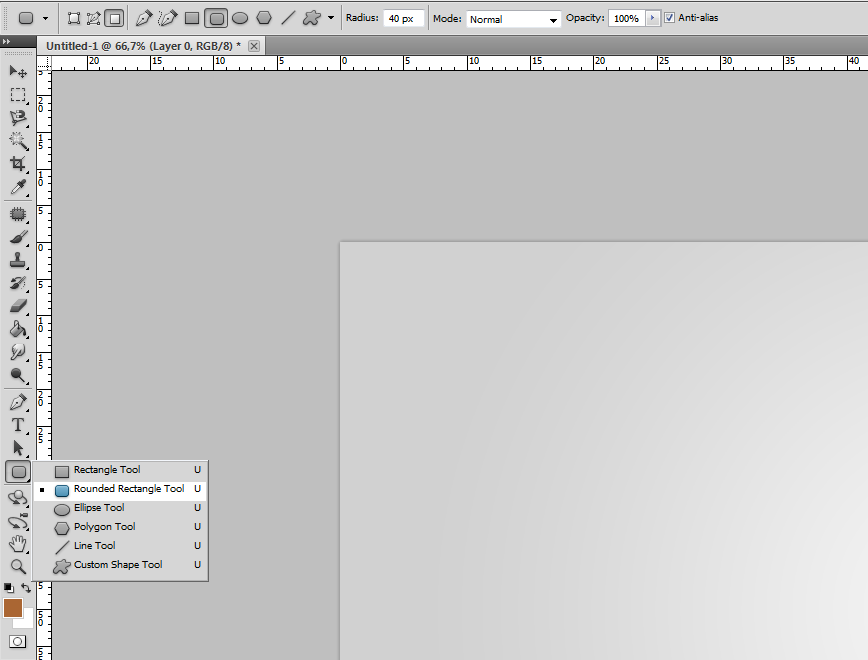
After selecting the rounded rectangle tool from the toolbar you set the corner radius to 40 pixels in the options bar on top. Colour is less important as we will apply a texture later on. For the moment go with #aa6633 to get a wood like appearance.
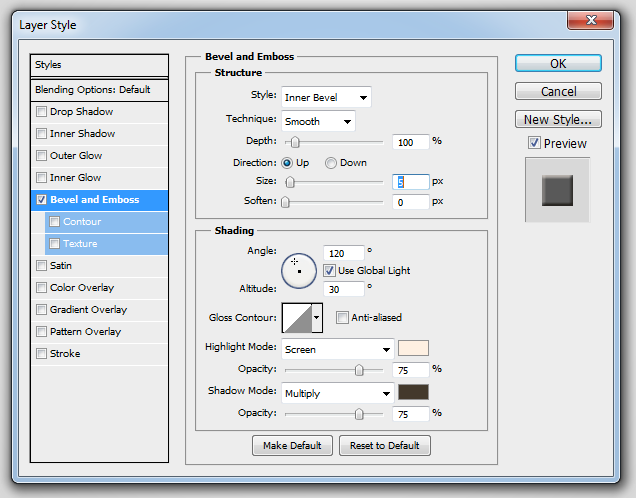
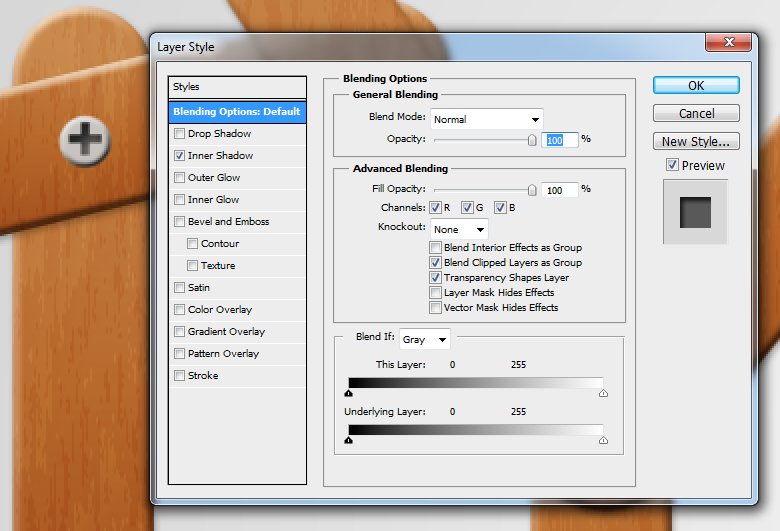
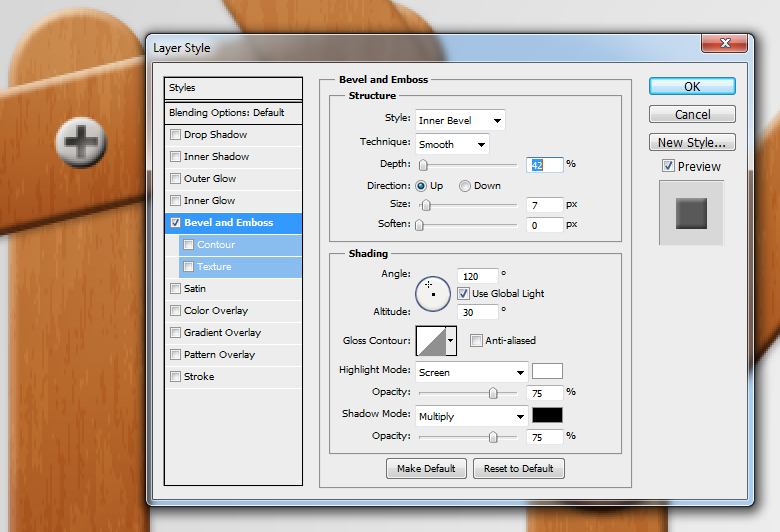
Now activate Layer Style > Bevel and Emboss with inner bevel, technique: smooth, depth: 100%, direction: up. Size should be 5 pixels with soften at 0. For the Highlight Mode in the shading area you select a light beige tone, for Shadow Mode a dark brown.

Activate another Layer Style > dropshadow. This you set up with opacity: 30%, distance: 2 and size: 4 pixel.
Creating the wood texture
Open a new document with white background, sized 800×900 pixel. Press D on your keyboard to set the colours to standard black (foreground) and white (background).
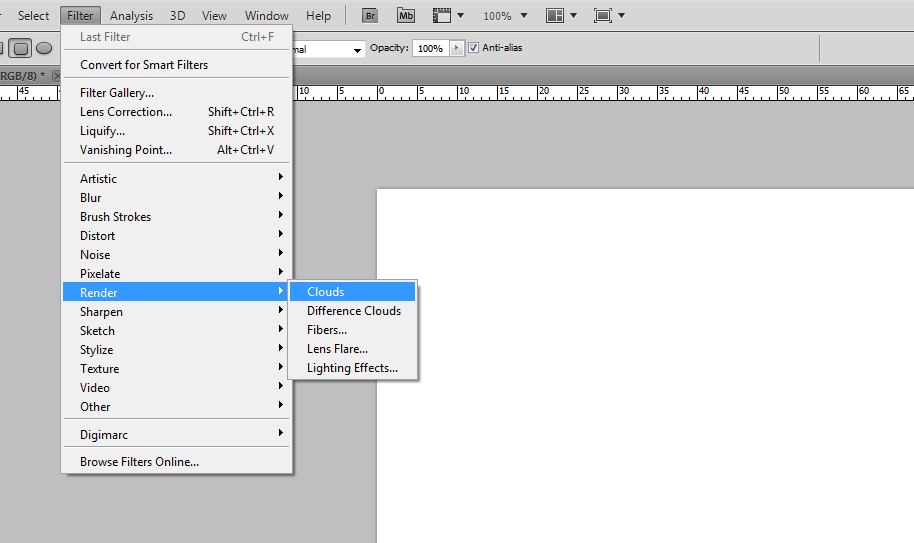
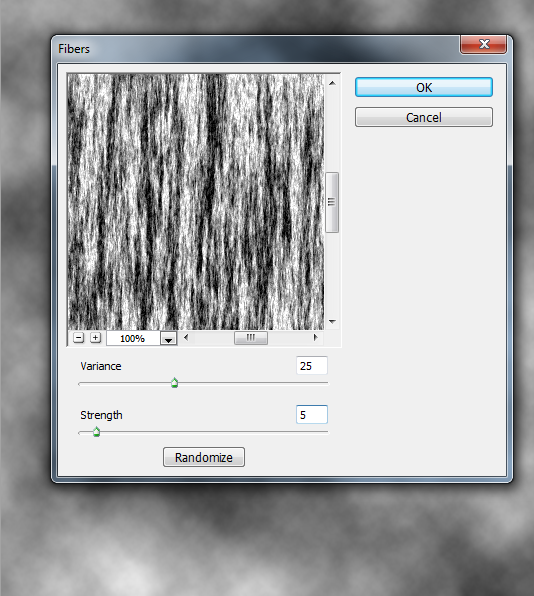
Go to Filter > Render and apply the Cloud filter, directly followed by the Render > Fiber filter with variance 25 and strength 5.
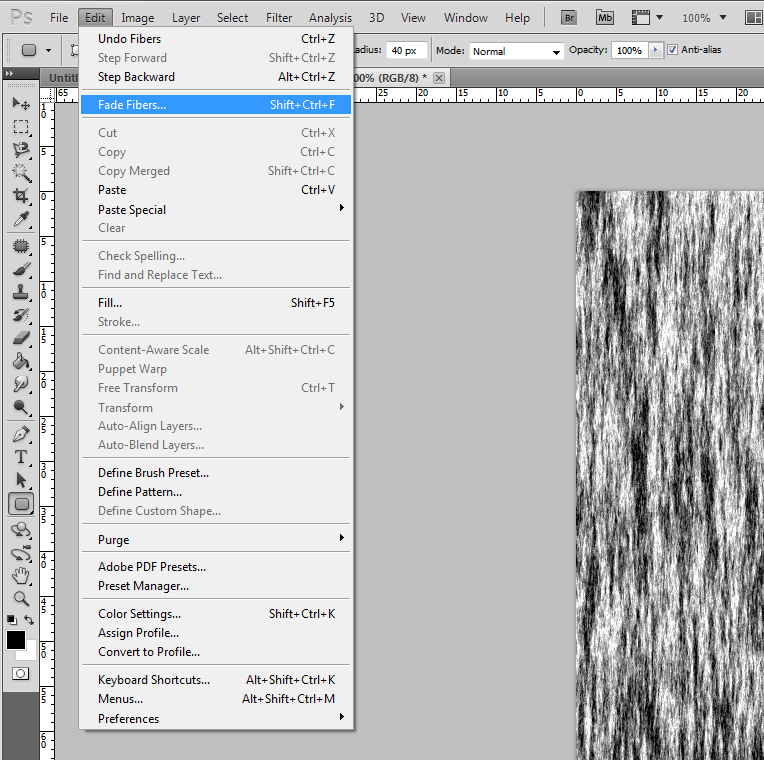
Through Edit > Fade Fibers at a value of around 10% for opacity you get a good base for the wood texture.
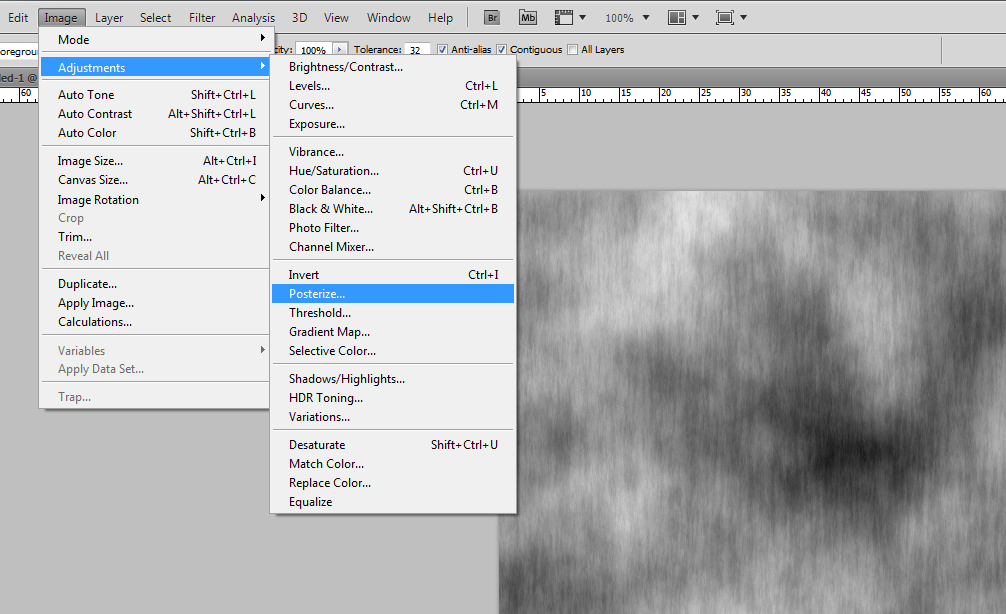
For the next step you go to Image > Adjustments > Posterize and enter a value of 16.
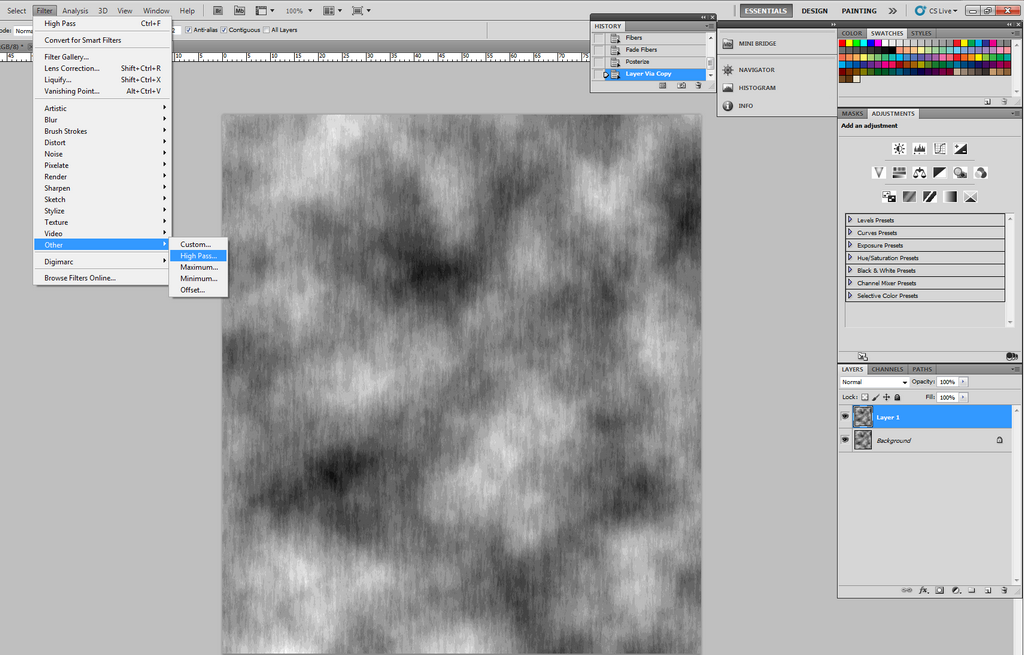
Copy the layer with Ctrl+J. On this new layer you apply Filter > Other > High Pass with a radius of 10 pixels.
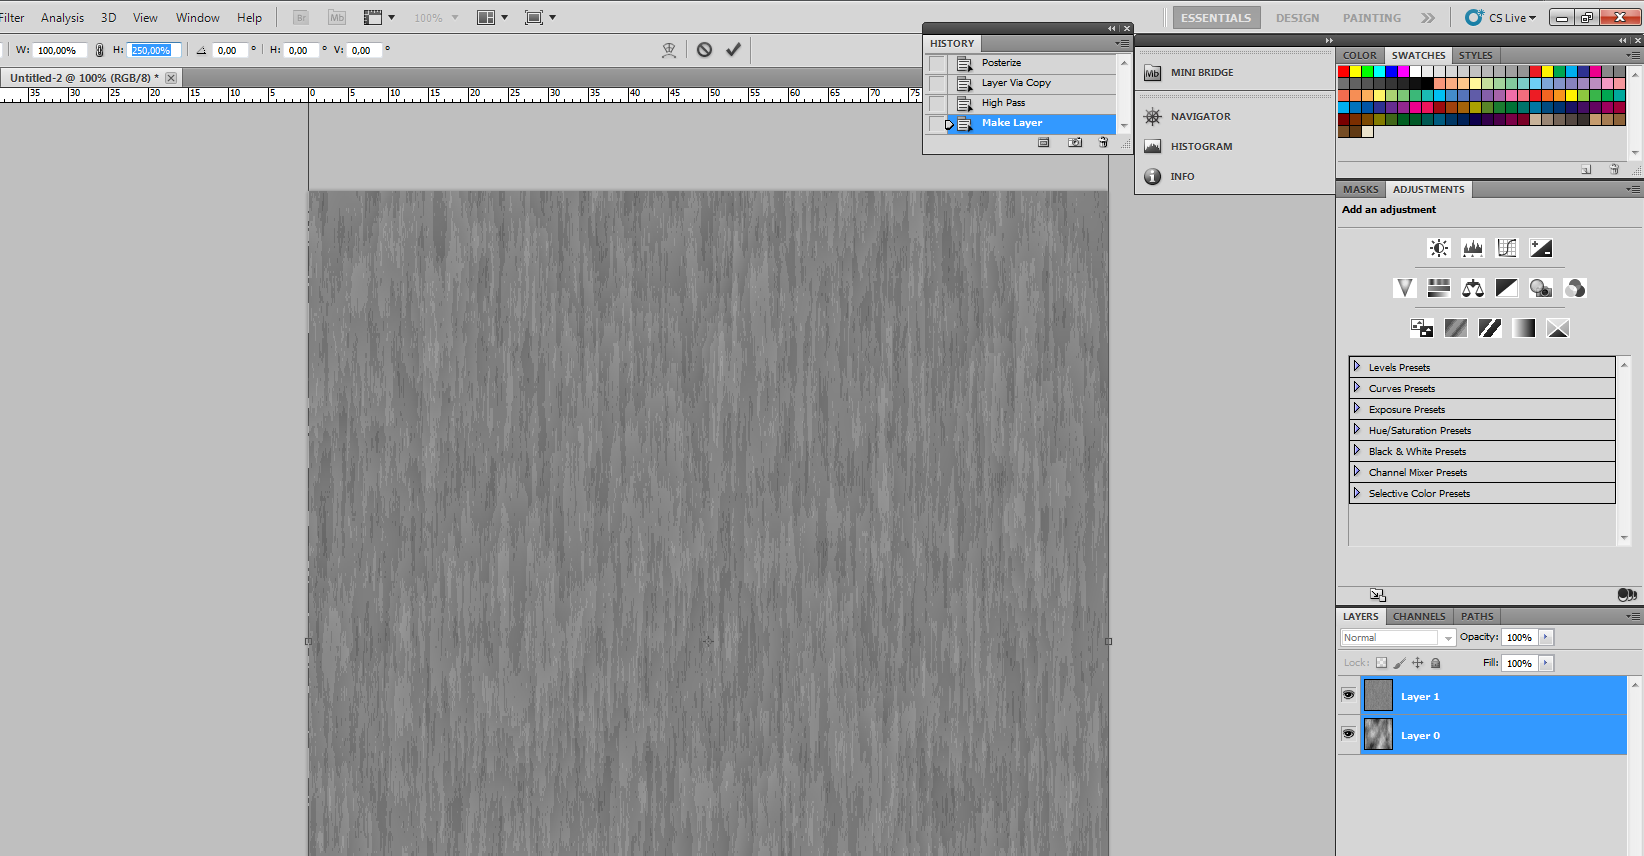
With a double click on the background layer you turn it into layer 0 to make it fully editable. Keep Ctrl pressed and click both layers. With Ctrl+T you can edit their height, which you set to H: 250% in the options bar at the top.

Create a new layer and fill it with a brown tone suitable for wood (eg #aa8466). Put this layer below the other two. You now change the Blending Mode of the top layer to Vivid Light and of the second layer to Soft Light. This second layer you also reduce to 30% opacity. After that you reduce all three to a single layer via Layer > Flatten image.

After pressing Ctrl+A to select the whole image go to Edit > Define Pattern and give the whole thing a meaningful name. How about “wood pattern”? Texture done; time to go back to the original piece of wood.
Applying the texture
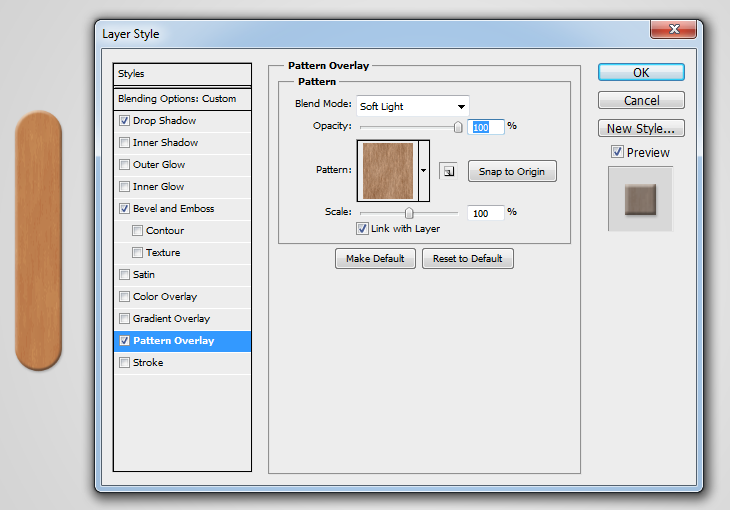
Double click the layer with the piece of wood and set the check for Pattern Overlay. Select the wood pattern, change the Blending Mode to Soft Light and reduce opacity to 80%.
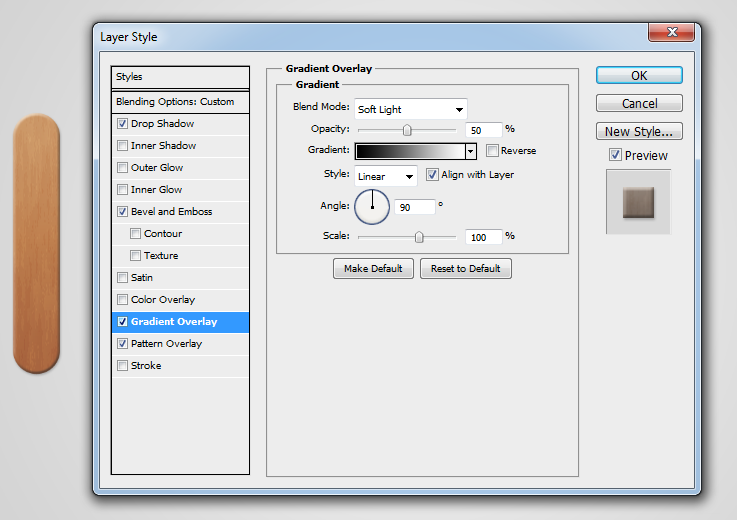
Now also activate Gradient Overlay with Blending Mode Soft Ligt. The gradient needs to be black to white at an opacity of 50%.
There’s your piece of wood to create the type.
Create the type
Use the Type tool to create a model for placing the wood pieces. In the character panel (Windows > Character) you set Tracking to a value which lets the individual characters overlap slightly.

To place the timber pieces copy the layer and work with the new ones. To adjust length and rotation press Ctrl+T and use the handles to drag, scale and rotate.
Screw up :)

To create the screws you first select the Elypse tool from the toolbar with colour set to a light grey. Keep Shift pressed to get a circle. Double click the shape layer and apply the Layer Style > Bevel and Emboss. Depending on the size of the screw you need to adjust the settings for size and depth.
For the cross cut of the screw we use the Type tool and simply type a plus, which we place in the middle and adjust in size. This type layer we rig with Layer Style > Inner Shadow.
If you’re satisfied with the result select both layers and merge them (Layer > Merge layers). This new layer we again treat with Layer Style > Bevel and Emboss.
Put a screw (copy layer for each screw) in every place where the wood pieces join.

That’s it. :)