Fresh from the hidden toolbox
Adobe Illustrator is a fairly complex piece of software. Even after years of working with the vector powerhouse you likely find new features and options, extending the well known tools. Sometimes it’s a simple key stroke which allows creating complex geometric shapes with a only few mouse movements.
Circles and squares can likewise be turned into ornaments with a single effect. All you need is a bit of preparation. The gradient brush, which we explain in this article, also requires a bit of basic work to build on. If that isn’t what you need how about some stylish retro waves – all with only a few steps. Feel inspired and don’t forget to tell us what helped you most.
Duplication
The duplication effect can be used with every drawing tool. Let’s start with the Polygon Tool. Set colour to empty and contour to 0.25pt in black. Using this tool creates a hexagon by default. A very versatile shape – but not really an impressive one at first glance.
However, by pressing the arrow button (besides the left side Shift key on your keyboard) you’ll see a completely different result. The form repeats from the point where you start to drag and follows your mouse path. Give it a try to see the power behind. Unfortunately it doesn’t work with all versions (CS2 doesn’t).
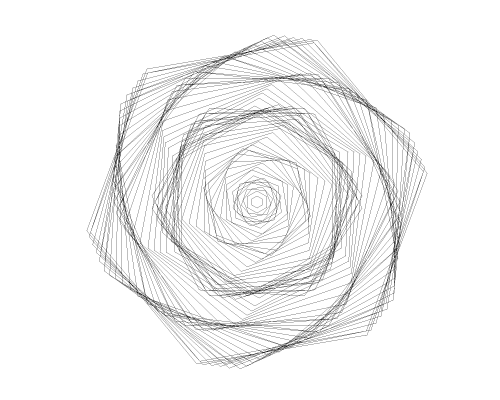
Additionally pressing the Caps-Lock key limits the available angles. You see that quite well when using the Ellipse Tool.
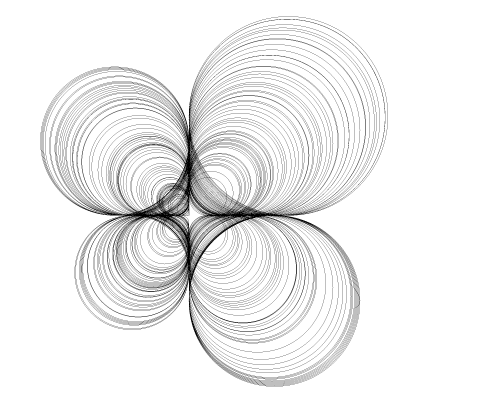
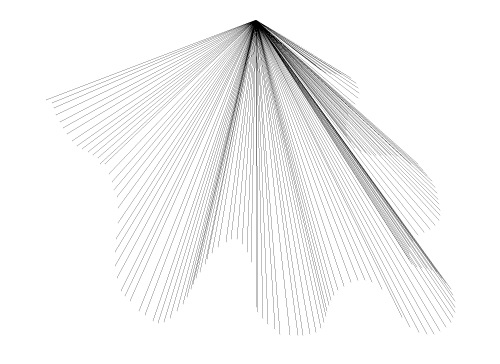
With the Line Segment Tool you achieve the most interesting results by dragging the cursor in a wavy line. This creates forms like the line art below. If you also press the Alt key the lines extent in both directions from the starting point.
Pucker and Bloat
These two effects are a simple way of changing forms on the fast track. In some cases preparation is recommended to get the most out of it. At first create a circular shape with the Ellipse Tool in a colour of your choosing. Keep Caps-Lock pressed to achieve a perfect circle.
Within the circle you create another smaller one. Select both with the Selection Tool and in the Options Bar select the boxes for centric horizontal and vertical alignment.
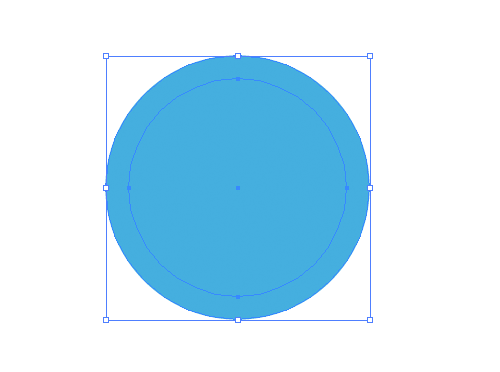
In the Pathfinder Window click Minus Front (available since CS4) which gives you the circle you see below. In the Object Menu > Path you select Add Anchor Point to create the handles you need for the following modification.
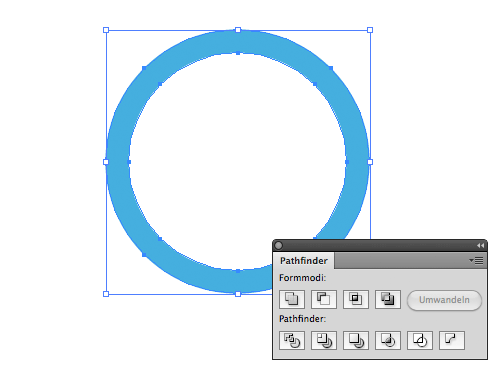
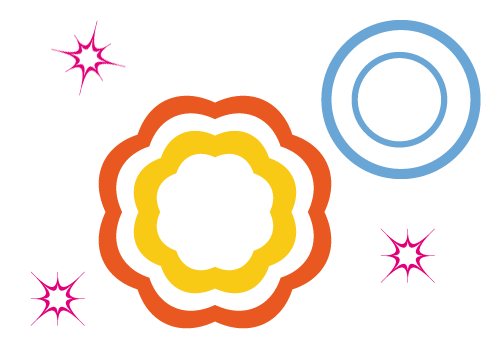
In the Effects Menu > Distort & Transform go to Pucker and Bloat and activate the preview function. Moving the control to the left creates a star shape. Moving it to the right transforms the ring into a flowery form. The effect remains editable through the Appearance Window.

Using differently coloured rings also creates some nice results. The shapes created this way can also be saved as icons/symbols for later use. To do so, select the form with the Selection Tool and drag it into the Symbols Window. Give the shape a new name and turn it into a Graphic if you like.
Gradient Brush
Creating a gradient brush isn’t that difficult. Choose the Rectangle Tool and create a small square (use Caps-Lock) in a colour of your choice without contour. Having the Alt and Caps-Lock keys pressed you use the Selection Tool to drag two copies from the first square and place them to the right of the original. The colours of these copies you change according to the gradient colours you need.

With all squares selected go to Menu > Object > Blend > Make. This creates your gradient. In the next step draw a curvy line with the Pen Tool. Check that fill and contour are not selected. Take the Selection Tool and include all paths.
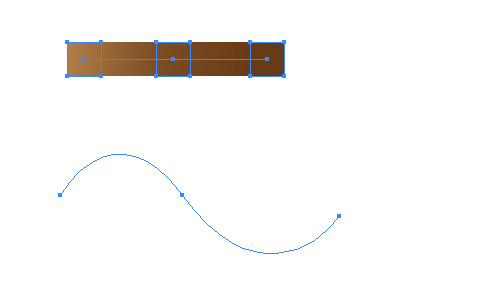
Now go to Menu > Object > Blend > Replace Spine and optimize your gradient. Double click the Blend Tool and in Blend Options choose Align to Path. The gradient could also be improved via Spacing and a Specified Distance of 2 px.
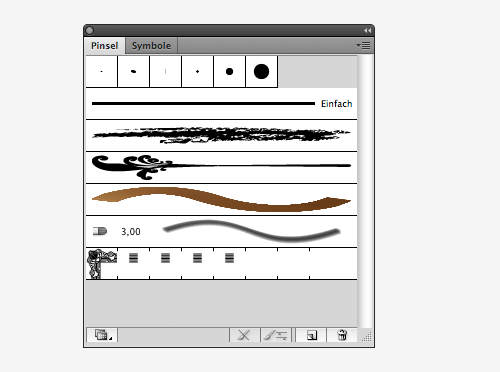
To turn this gradient into a brush select the whole thing and drag it into the Brushes Panel like you did with the shape earlier in this tutorial. When you now choose a brush you can select the image brush (the gradient) you just created.
Retro Waves
For trendy retro waves you first need to create a foundation you can work with. To start off choose the Rectangle Tool and drag open a lengthy shape. Copy this form with the Selection Tool while having the Alt and Caps-Lock keys pressed. Repeat this 5 times and place the copies below the original. Change the colours of each to create a nice band of colours.
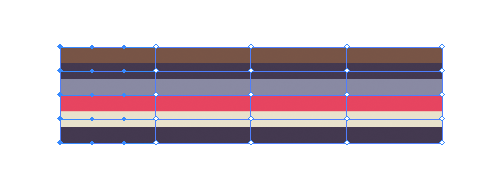
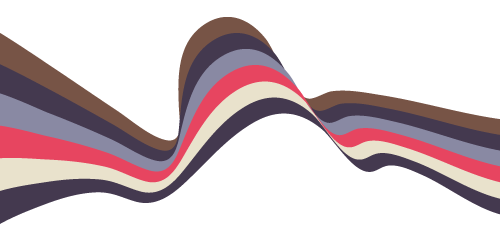
Select all strips you just created and in Menu > Object > Envelope Distort choose Make with Mesh. Keep the 4 columns and rows it suggests. Later you can experiment with higher or lower values. With the Direct Selection Tool pick the first segment and use the Scale Tool to increase the size of the shape.
The Rotate Tool allows you to rotate the form left or right. You do the same with each segment. Of course, you could also simply use the Direct Selection Tool to reposition individual segments. Don’t be shy to simply experiment and find the coolest form you can create.
Did you know all of these little tricks and tweaks? There’s so much to discover for beginners or experts and with every new release Adobe adds more of those.
You found a shortcut or trick hardly anyone knows? Don’t be shy to share it here or on our Facebook page.






hi, would like to ask, the duplication you mentioned at the 1st, what’s the step and how to make the effect?? thanks
Hello,
Following our tutorial, you’ll have to duplicate the layer of your design to create such shapes. You can duplicate it as much as you want.
We hope this helps!
Kind regards,