10 secret and hidden tools
Even if you use Photoshop for a few years, already, you likely don’t know all the tools and options. The application is too complex and deeply layered for the very most to accomplish complete mastery. It’s time to reveal some of the secret tricks.
We concentrate on the toolbox for the creative mind, also called the toolbar, to worm more features out of some really important tools. We’ll be using various selection tools, the clone stamp and a few more “exotic” features such as the note or sharpen tool.
01. Transform Controls (Move Tool)
Let’s assume you wish to transform an object. Many users take the rather long way via Edit > Transform and choose one of the options. Another way would be to Ctrl+T for free transformations.
There’s one more option which is ignored often enough. Choose the Move Tool and in the options bar check “Show Transform Controls”. With the Path Selection tool this also works for vector shapes and paths.
The object can now be scaled and rotated as usual. With Ctrl pressed the form can be distorted, with Ctrl+Shift you apply skewing and with Ctrl+Shift+Alt elements will be distorted perspectively.
To apply the warp transformation some other transformation needs to be triggered (it’s sufficient to click one of the transformation handles on the element) beforehand as only then appears the switch button between “free transform” and “warp mode” on the right sight of the transformation bar.
The reference point (by default) in the middle of the element can be dragged to any other point which would then, for example, serve as anchor for rotations.
To apply a transformation simply press enter or click “Esc” to undo.
02. Tool presets (Rectangular Marquee Tool)
Let’s use the Rectangular Marquee as example for tool presets, which can be generated for almost every tool. To access them click the little down arrow on the left side of the options bar. In many cases there aren’t any predefined ones.
To create a new preset enter your preferred settings in the options bar. For marquee this could be “fixed size” with manually defined width and height instead of “normal”.
The first option “New Tool Preset” can be used to save your new preset. Give it a descriptive name and press “ok”. It’s now part of your Photoshop settings and available for later use.
With Window > Tool Presets you open the a panel to access all available tool presets. This can also be used to create or delete presets. Check “current tool only” to limit it to the ones you need for your immediate workflow.
03. Sample All Layers (Quick Selection Tool)
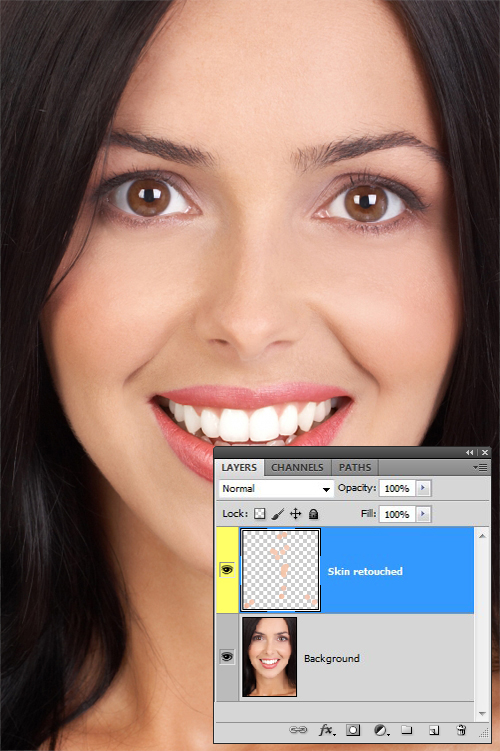
For some tools, such as Quick Selection, Magic Wand, Healing Brushes or Smudge, Photoshop offers the option to sample all layers. This is especially useful for non-destructive corrections. With this option you can work on an empty layer for skin corrections during a beauty touch-up.
Click the “Create New Layer” button and activate “Sample All Layers” in the options bar of a suitable tool like the Spot Healing Brush. The big advantage is that you don’t change (ruin?) the original image layer. The area and scope of the manipulations can also be edited through layer masks or opacity settings.
04. Front Image (Crop tool)
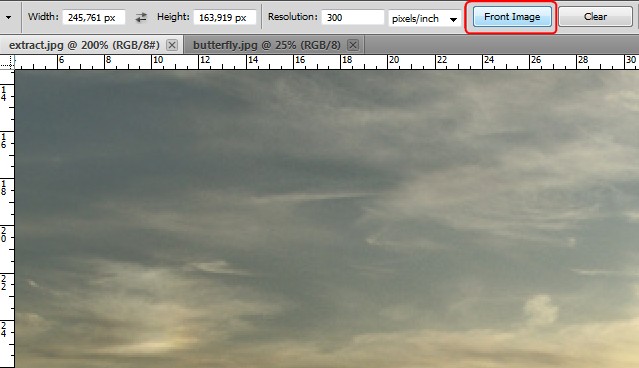
This is an easy but nevertheless handy tip for the Crop Tool. It offers you to manually enter values for width, height and resolution to get a predefined output. If you wish to take the values from another image you could switch to it, go to Image > Image Size and copy these values.
However, there’s a better option. Switch to the image with the target size and press “Front Image” in the options bar. This populates the tool settings with the image’s attributes. Now go the image you want to crop and do your deed. “Clear” deletes the settings.
05. Straighten (Ruler Tool)
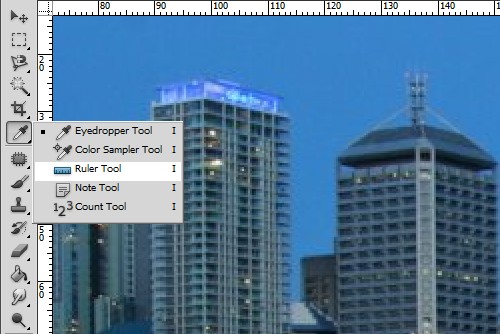
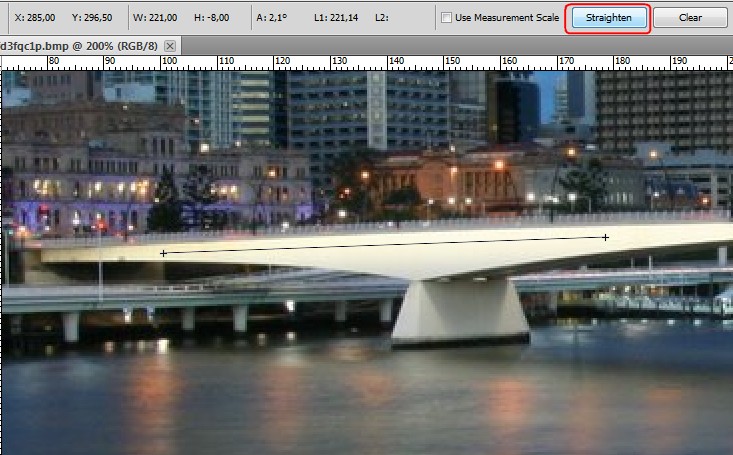
To correct horizon tilt of an image use the Ruler Tool, which you find with a right click on the Eyedropper Tool. Set a first point and drag the line along the horizon to a second point, where you click again. Click Straighten in the tool bar to rotate the whole image accordingly. This feature also automatically crops the edges where image information is lost from the rotation.
By pressing Ctrl+Z you undo the automatic crop. To suppress this option right away apply Straighten with Alt pressed. In Photoshop CS5 you can Quick Select the empty corners (optimize where necessary). With this selection go to Edit > Fill (or press Shift F5) and select Content Aware to let Photoshop do its magic tricks. If required make some corrections afterwards.
06. Note Panel (Note Tool)
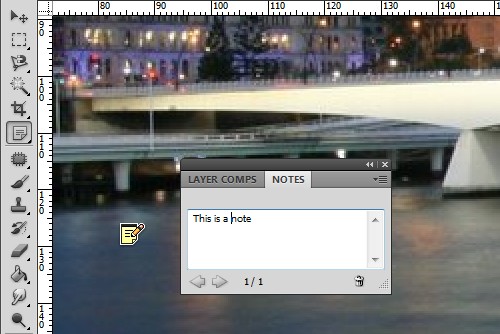
The Note Tool is hardly used even though it is a really powerful tool for team collaboration. If there is something you want a colleague to have a look at or the next production team to know simply attach a “sticky note”. To access all notes in an image open the Notes Panel.
You find it via Windows > Notes or by clicking Show/Hide the Notes Panel in the options bar of the Note Tool. Use the arrows or click them directly to navigate between notes. With the trash button they can be deleted if not required anymore. In the tool’s options bar you can change note color and author or delete all notes at once. To manage their visibility navigate to View > Show and check or uncheck Notes.
07. Patterns (Healing Brush Tool)
The Healing Brush is perfect to optimize faulty skin areas with a single click. Select a nice looking source skin area with Alt pressed and then click the part you wish to correct. There is another useful option which requires a few steps for preparation.
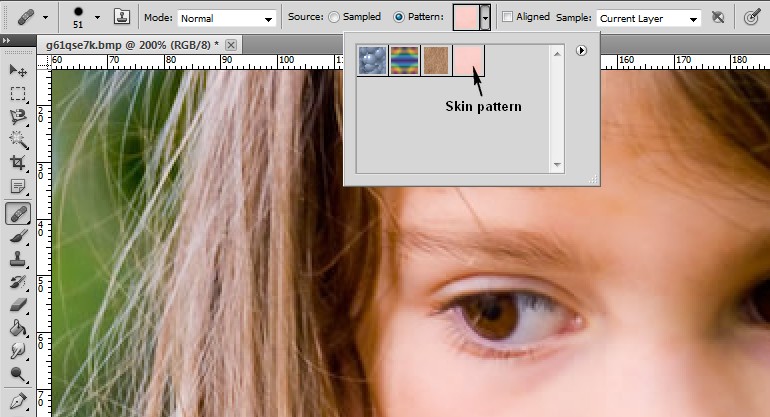
Take the Rectangular Marquee Tool and select a good looking skin area. In the menu you go to Edit > Define Pattern and give it a name. Deselect with Ctrl+D. Switch to the Healing Brush Tool and in the options bar change the source from Sampled to Pattern. Click the tiny arrow beside the preview icon to select your previously created skin pattern. The Healing Brush now applies this to beautify the model’s skin.
08. Clone Source Panel (Clone Stamp Tool)
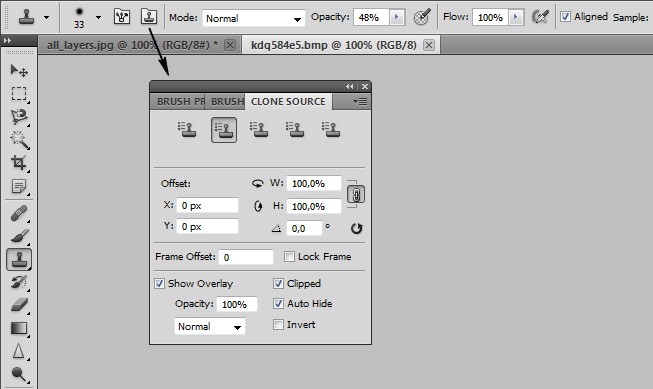
The Clone Stamp is the easiest option to copy pixels from A to B. To get a bit more control of your Alt+Click source sampling you can open the Clone Source Panel. It allows you to define up to five cloning sources which don’t even have to be in the same document.
Select a stamp and then a source with Alt pressed. Additionally you can define how the clone stamp translates from source to application. It’s recommendable to activate “Show Overlay” and “Auto-Hide”. This shows the source while you hover the clone stamp and hides it on clicking.
09. Gradient Type: Noise (Gradient Tool)
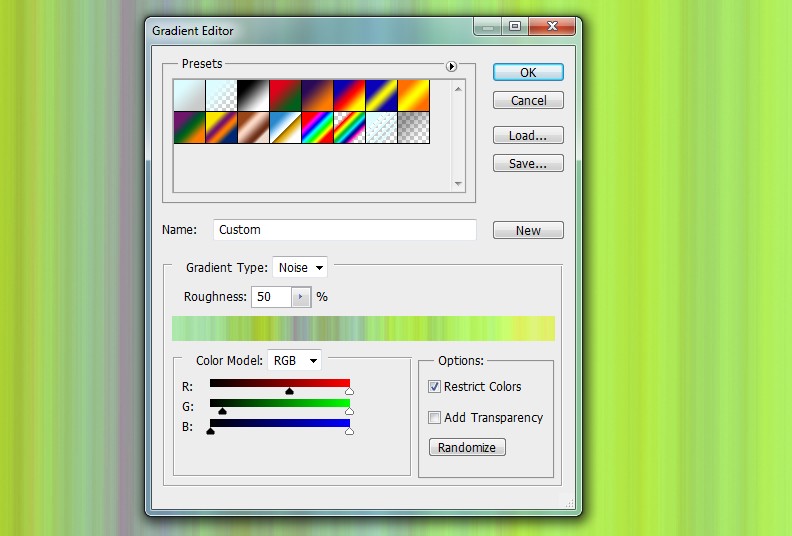
The Gradient Tool can also be used to create a striped pattern. Click the gradient preview in the options bar of the Gradient Tool to edit the gradient. In the middle of the panel you can change the gradient type from Solid to Noise. Roughness defines how hard or smooth two colors are separated. The color handles allow you to modify color variety.
In the options section you can add transparency. The Randomize button is for those who wish to experiment a bit. Give it a try. When done with the settings you can normally apply the gradient by dragging it in the desired direction.
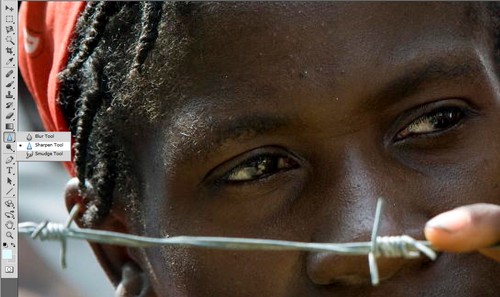
10. Luminosity (Sharpen Tool)
The Sharpen Tool is rather unpopular as it tends to ruin images with only a few clicks instead of improving it. However, there is technique to get some good and very precise results. Create a new layer and with the tool active check Sample All Layers. This applies the tool on a new layer as described in point 3.
This alone doesn’t really effect the rather rough implementation of the feature. You could of course reduce the threshold to make it a bit smoother. A better way is to restrict the Sharpen Tool to the outline while protecting the colors. For that switch the mode from Normal to Luminosity in the tool options. Through layer opacity or Edit > Fade Sharpen Tool you can reduce the effect later on.
Conclusion
There are tons of hidden features and tools in Photoshop and we likely will find plenty new ones as we work with the software and explore new releases. It’s these little tricks that separate the experts from the laymen.


