To get the attention of the perfect company
In the world of graphic design sometimes it is not enough to send a CV that only outlines your studies and experience. Companies need practical examples of your work. In this respect, being original and presenting high quality examples is a deciding factor to get the job.
We had previously given 32 amazingly creative job application examples that could help you stand out from other job seekers. Today we go a step further and give you some inspiration to make a video CV, a practice that is becoming widespread among graphic designers, specifically 3D specialists. The opportunity to show their skills, alongside their education and experience, drives this new trend.
Story
The first step is to create an action plan. We want to show companies that we are able to create and give life. As a 3D graphic designer, the best way to do so is by creating different characters which will show your skills in the matter. This sounds basic but is the core of the experience. The result will not be outstanding without a good story behind it.
We are going to use this video CV of the Spanish graphic designer Javier Hernández as example. He has chosen different characters –people, cartoon characters and animals- because their rigging -their internal skeleton- allowed them to be very expressive.
After you have chosen the characters, you have to write a catchy script and interact with the characters that you created.
In this particular case, the artist starts to explain his CV while the characters interrupt him. The first character that appears is a small girl over his shoulder. After that, a cartoon comes down from a rope and the artist decides to catch it and take it out. The characters continue to show up. The next one is a big dog that plays with the graphic designer. In the background you can also see Spiderman and a woman, in real size, that gives him some advice.
In this manner, Javier has built a catchy and funny story with our characters showing the recruiters what we are able to create with 3D.
There are some other ways to create your own original video CV if you are a 3D designer. For example, the artist Jacob Hall creates his own brand and builds his video as an advertisement.
Graeme Anthony’s resume is another very original example. In his video, you can click on his CV’s statements to choose which one you want to watch. The possibility to interact with it makes his application unique. Besides these examples, you can find another kind of video CV like Mason Johnson´s or Justin Bureau’s ones. Justin, for example, uses a trendy music and shows his experience in a funny way.
In fact, if your video CV is good enough, you can become a Youtube phenomenon like Alex Biedrzycki and his video “Hire Me”.
Overall there is a lot of space for creativity, enough to be very original. However while you are creating a video CV there are some things that you must do, as being sure that the video is consistent with your desired job and to not simply read your resume.
The above considered, the next steps that you need to take in order to build your video CV are the following.
Software
The second step is to choose the right software. To animate the characters Javier used Autodesk Maya, except for the small cartoon that is going down a rope, for which he used Adobe Flash because you’re able to draw and animate in 2D rather than in 3D. You can also have similar results for 3D animation with software like Autodesk 3D Max, Blender, etc. Toon Boom or Adobe Photoshop -this one you only can animate in format .gif- are also good alternatives for 2D.
For the audio edition the artist used Adobe Premier, similar to After Effects. This is a basic and easy-to-use software. You can use also Sony Vegas or Windows Movie Maker.
Preparing your video
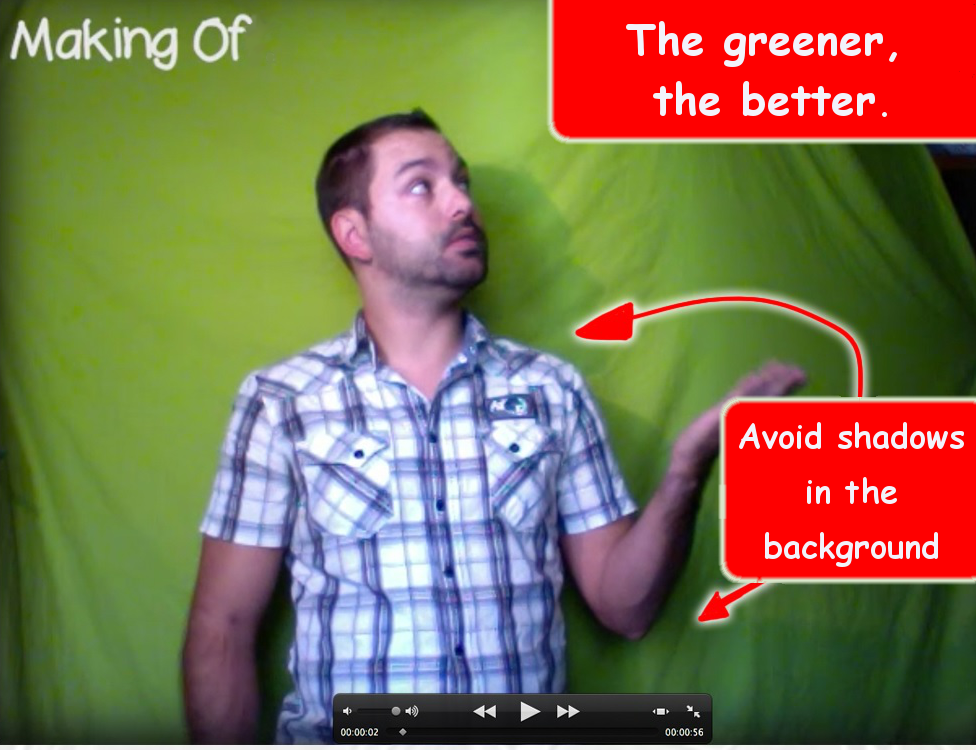
When you are sure about what you want to say and do, it’s time to get down to business. To create the background you need a chroma keying. For this purpose, use a blanket or a green tablecloth. The greener the tablecloth, the better. To get a good chroma effect you need appropriate lighting, because the background must be completely regular, without colour changes. You have to use bright green because in real life it is a really rare colour so it is very easy to erase the pixels in this colour. For this reason, it’s also very important to avoid shadows, because it would be more difficult to erase those parts.
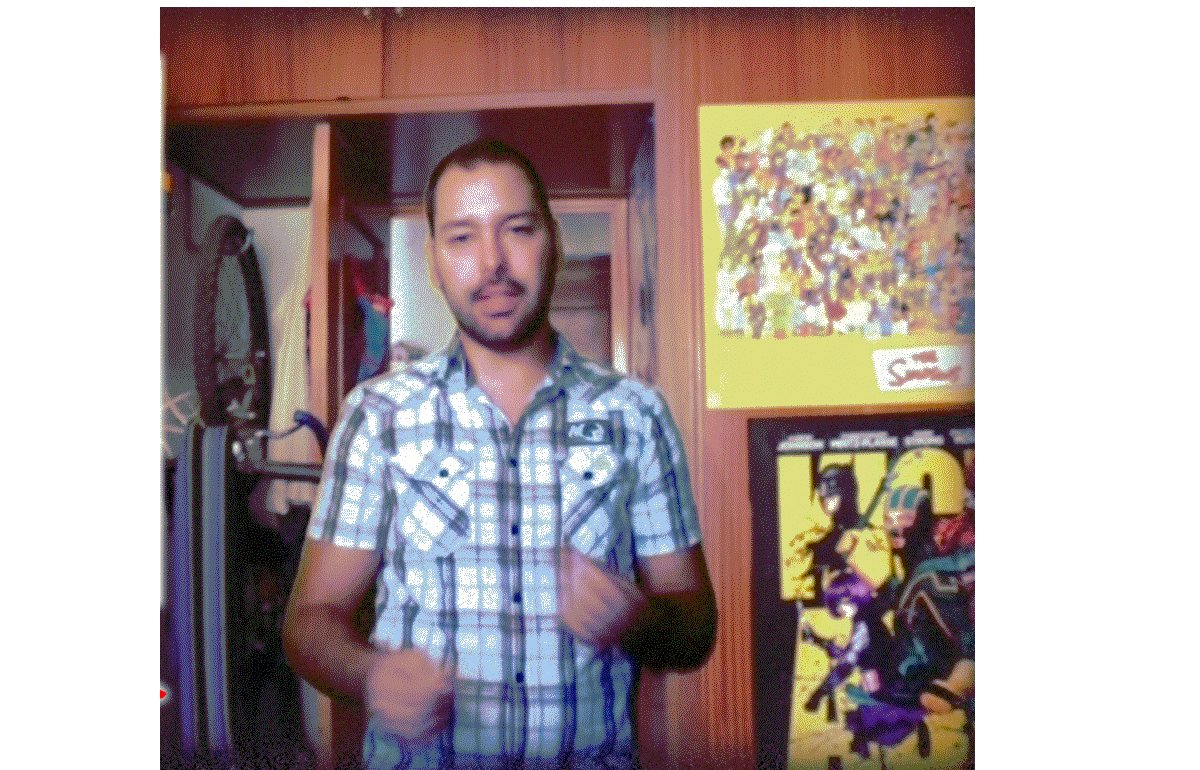
After setting up the tablecloth you can proceed to record yourself with After Effects, select original video and apply the modifier Keylight. In this way you are able to disappear the green background and, by adjusting the parameters, you will get an optimal result. Once the green background was erased Javier created a messy room for the background:
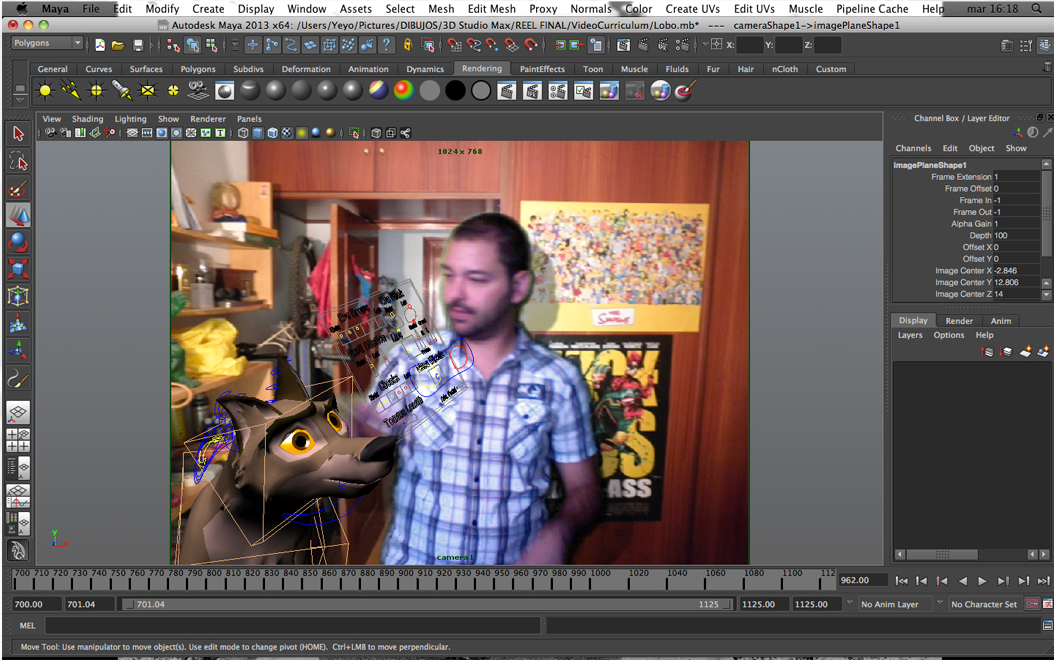
After adjusting the image with the Keylight to prevent any view of the green, it’s time to create the characters and insert them in the video. As noted above, to give life to the characters Javier used Maya and Flash. After creating our characters, it’s time to set them into the video.
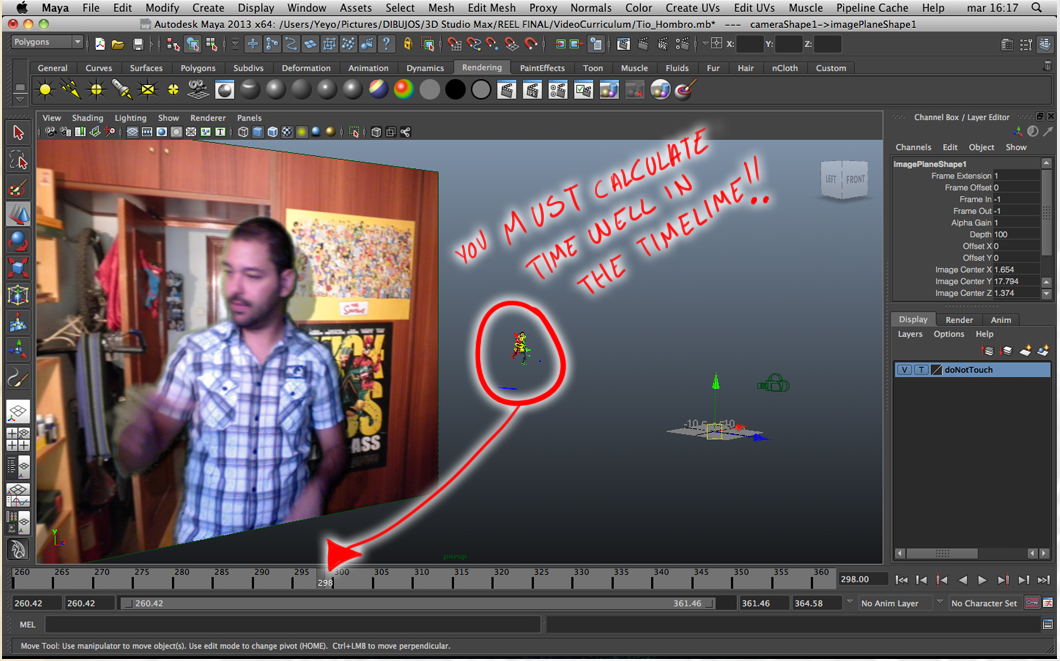
Another point to consider is the timeline. To this end, the bottom bar will help you control all the actions so the artist’s movements are in-sync with the characters, in this case the dog.
Finally, it’s time to use After Effects to organize all layers. Many of the lower layers will have to disappear. It’s very important to be very organized at this point as it’s very easy to get confused with all the layers that were created. So, little by little, you have just to put them in the order you want. Instead of After Effects, the artist could have used another software such as The Foundry Nuke.
After you are done with video edition and rendering in After Effects just export the project into Premiere and you will end with only one layer of video. That‘s your animation.
Keep your fingers crossed and good luck!
E. S.
