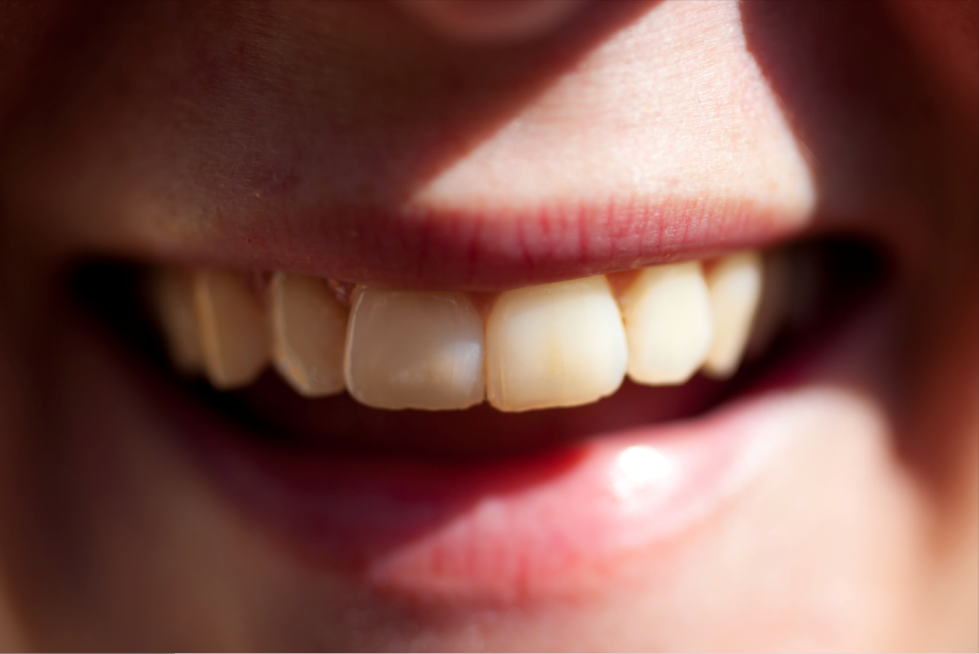
Cheat the digital dentist
Today’s tip could be said to belong into the „Photoshop basics“ category. It’s most likely a daily task for almost every photographer, certainly for every portrait specialist. We show you a fast and easy way to bleach teeth and remove yellow stains with Photoshop.
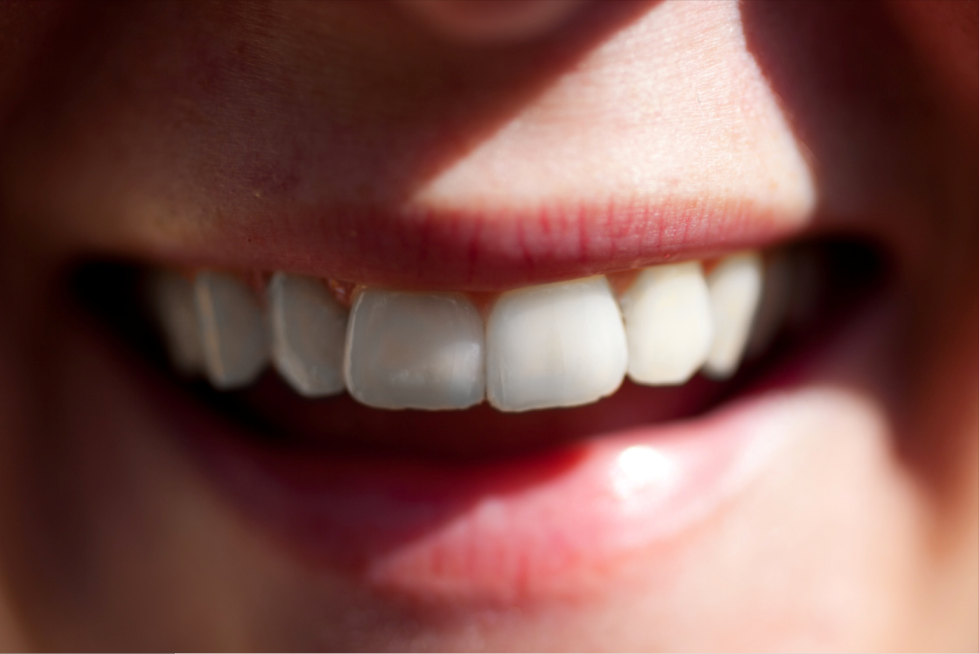
There’s a multitude of ways to achieve this. The one we show you today is as simple as it is effective. By using a black & white adjustment layer we get rid of any yellowish tint while preserving the original texture and shadows. This gives it a more natural touch.
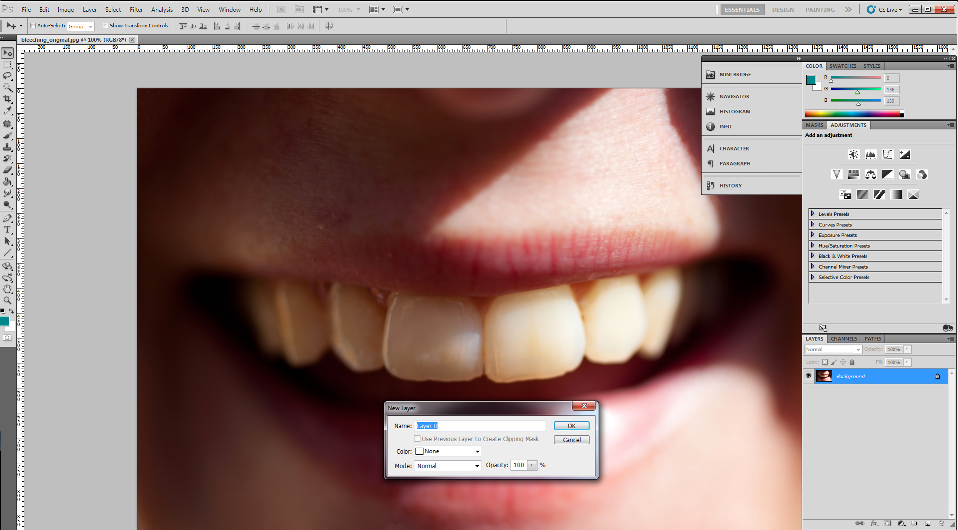
After opening the image in Photoshop we double click the background layer and confirm the following dialog with „OK“. The layer can now be edited.
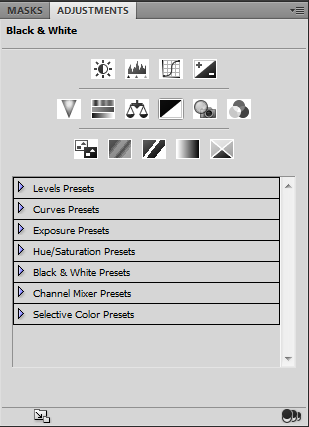
We go to Layer > New Adjustment Layer > Black & White Adjustment and apply it with the default settings.
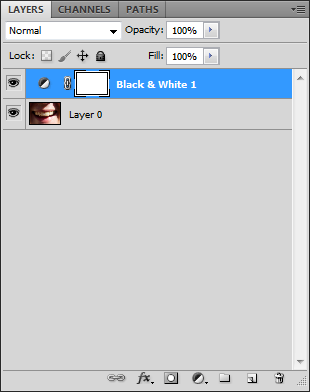
Our layers panel should now look like this. The image itself is completely black & white at the moment.
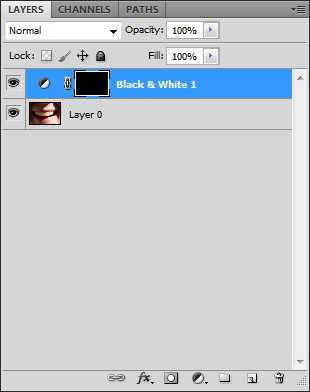
To retrieve the original colors click on the mask of the adjustment layer in the layer panel and fill it with black.
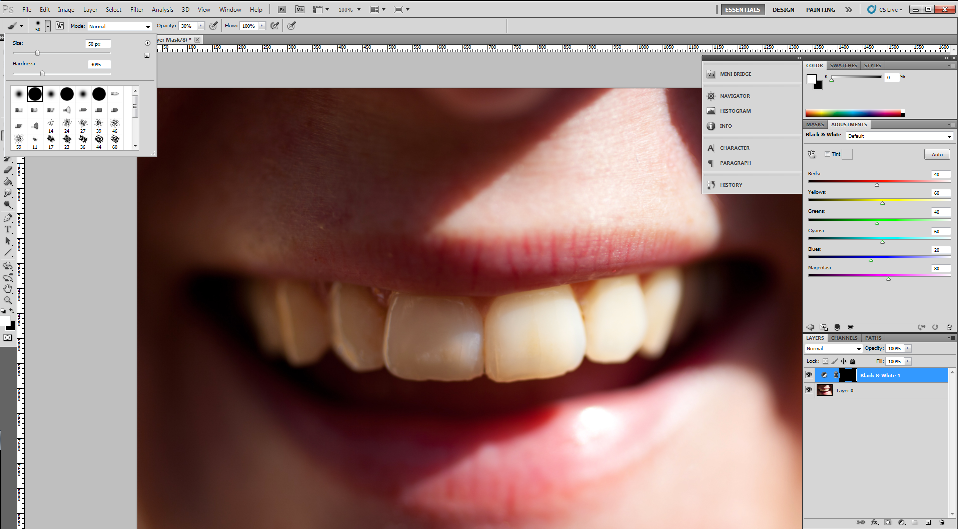
We now select a brush with a suitable size for the detail we are working on and set the foreground colour to white. Opacity can be at 100%.
Tip: For this workshop you only need the colors black and white. If you set one as foreground and one as background color you can switch between both by simply pressing “x”. This saves you quite some mouse work.
With the brush we now go over the area of the teeth we want bleached. However, check that you’re working with the layer mask selected. Don’t worry if we catch an area that shouldn’t be bleached. As we are working on the mask, all changes reversible by simply painting with black.
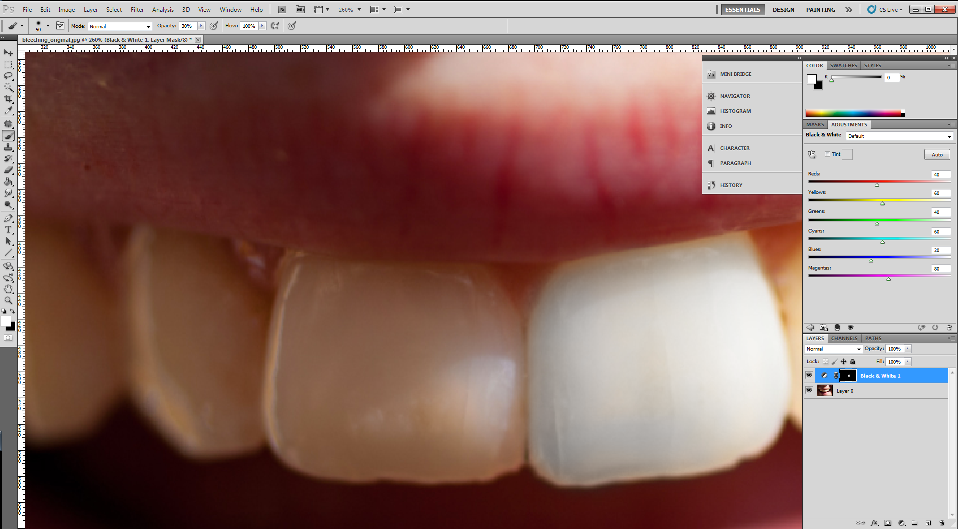
Once all teeth are bleeched you can apply some minor corrections where necessary. This could be areas, which are highlighted too much or the edge of the teeth where it might be difficult to separate teeth from mouth area. Corrections are best done with a soft brush (hardness below 50%) at around 30% opacity.
If the effect is too strong we can reduce the opacity of the black & white adjustment layer to let more of the original image shine through. Remember, no ones teeth are perfectly white. Allowing a bit of a tint makes the result appear more natural.

After only a few pictures you get into a routine, which allows you to touch up yellow teeth in less than 5 minutes.
With thanks to Håkan Dahlström for the original image on flickr.
MO/SdP